Create your account
Sign up, answer three quick questions, and your free trial starts straight away.
Updated 3 November 2026
It takes about a minute. Your free trial starts the moment the account is created, and everything you set up here can be changed later.
Sign up
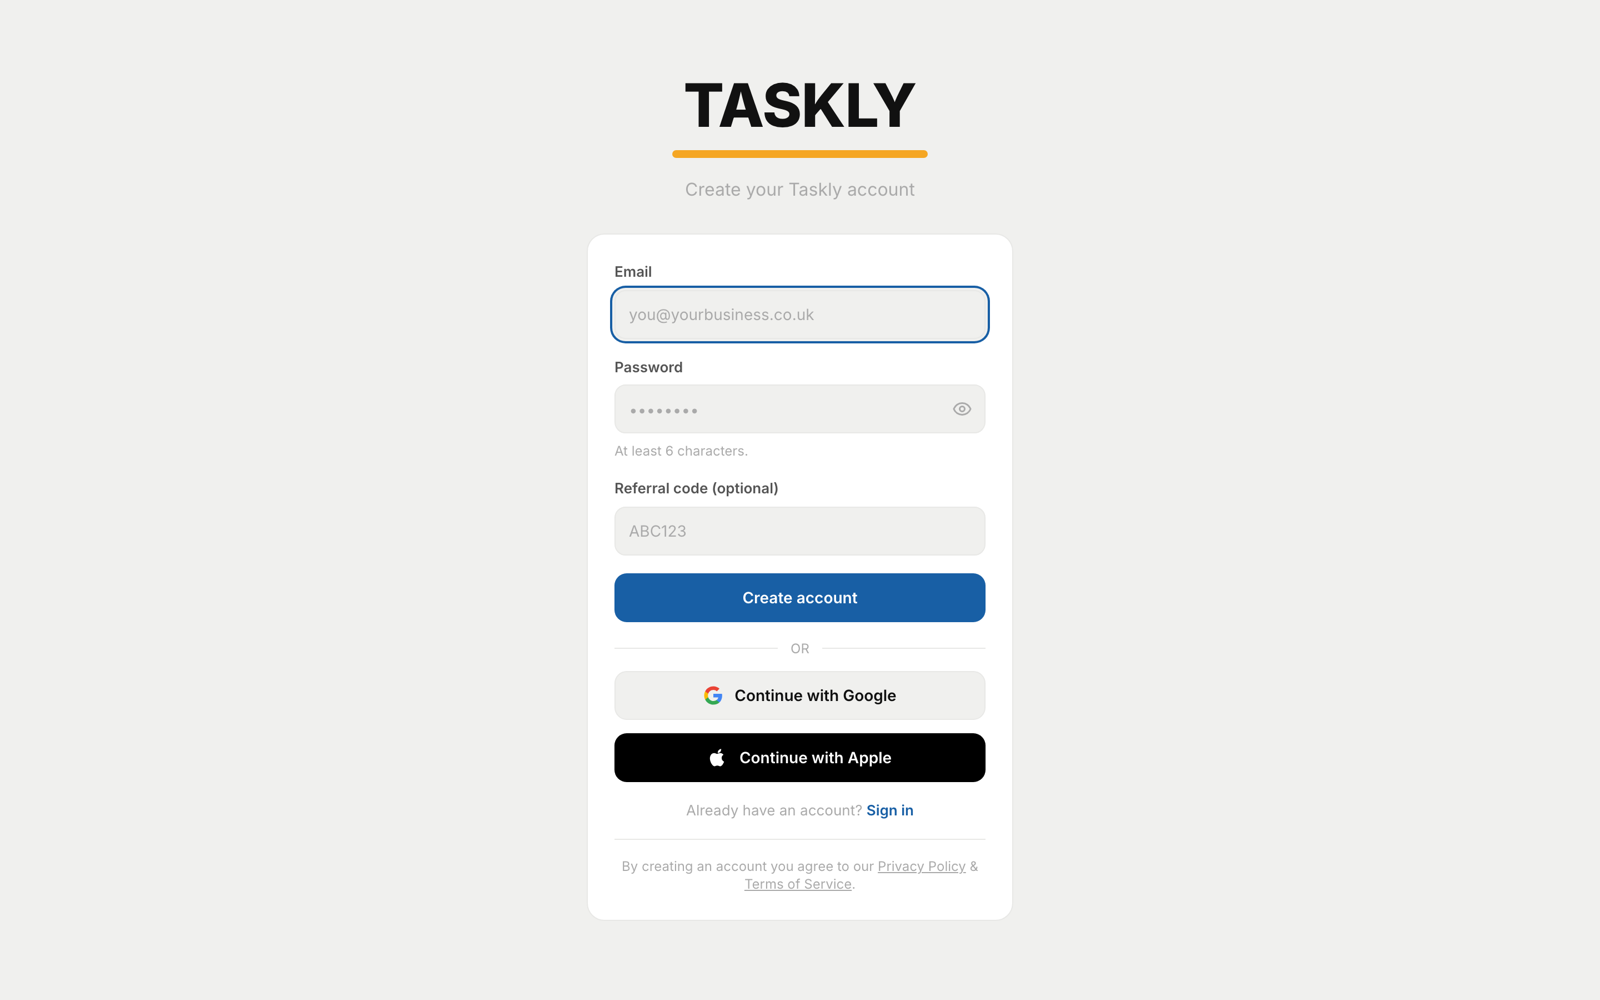
On the web
- Go to gettaskly.ai/app/signup. From the login page, Sign up takes you there too.
- Enter your email and a password of at least 6 characters, then choose Create account. Or use Continue with Google or Continue with Apple instead.
- If someone gave you a referral code, enter it in Referral code (optional) first. It makes your trial longer.
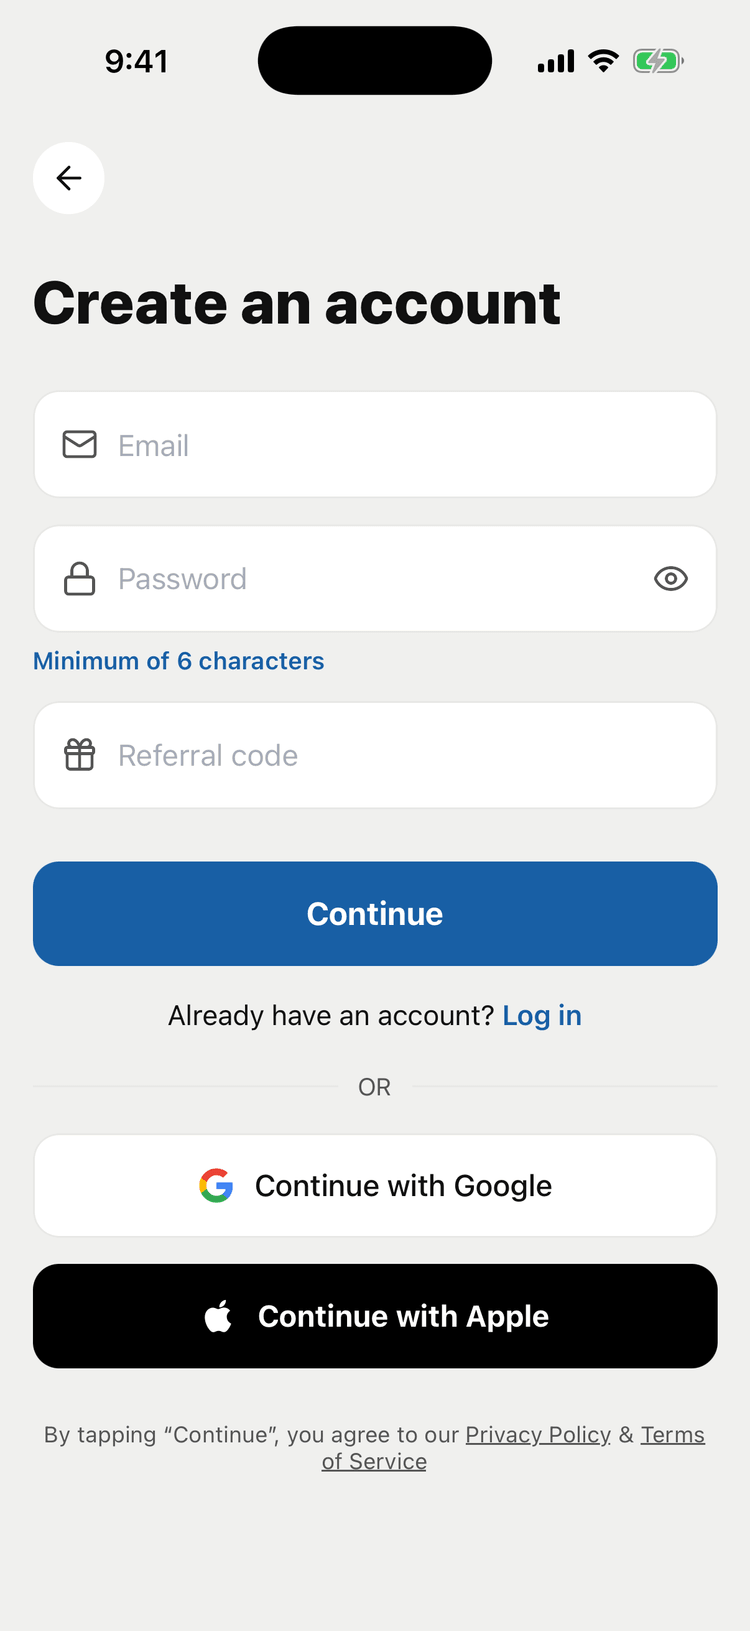
On the phone app
- Download Taskly from the App Store or Google Play and open it.
- Tap Sign Up Free, enter your email and a password of at least 6 characters, and tap Continue. Google and Apple sign-in work here too.
- If someone gave you a referral code, enter it before you continue. It makes your trial longer.
 (opens full size)
 (opens full size)
Tell us about your business
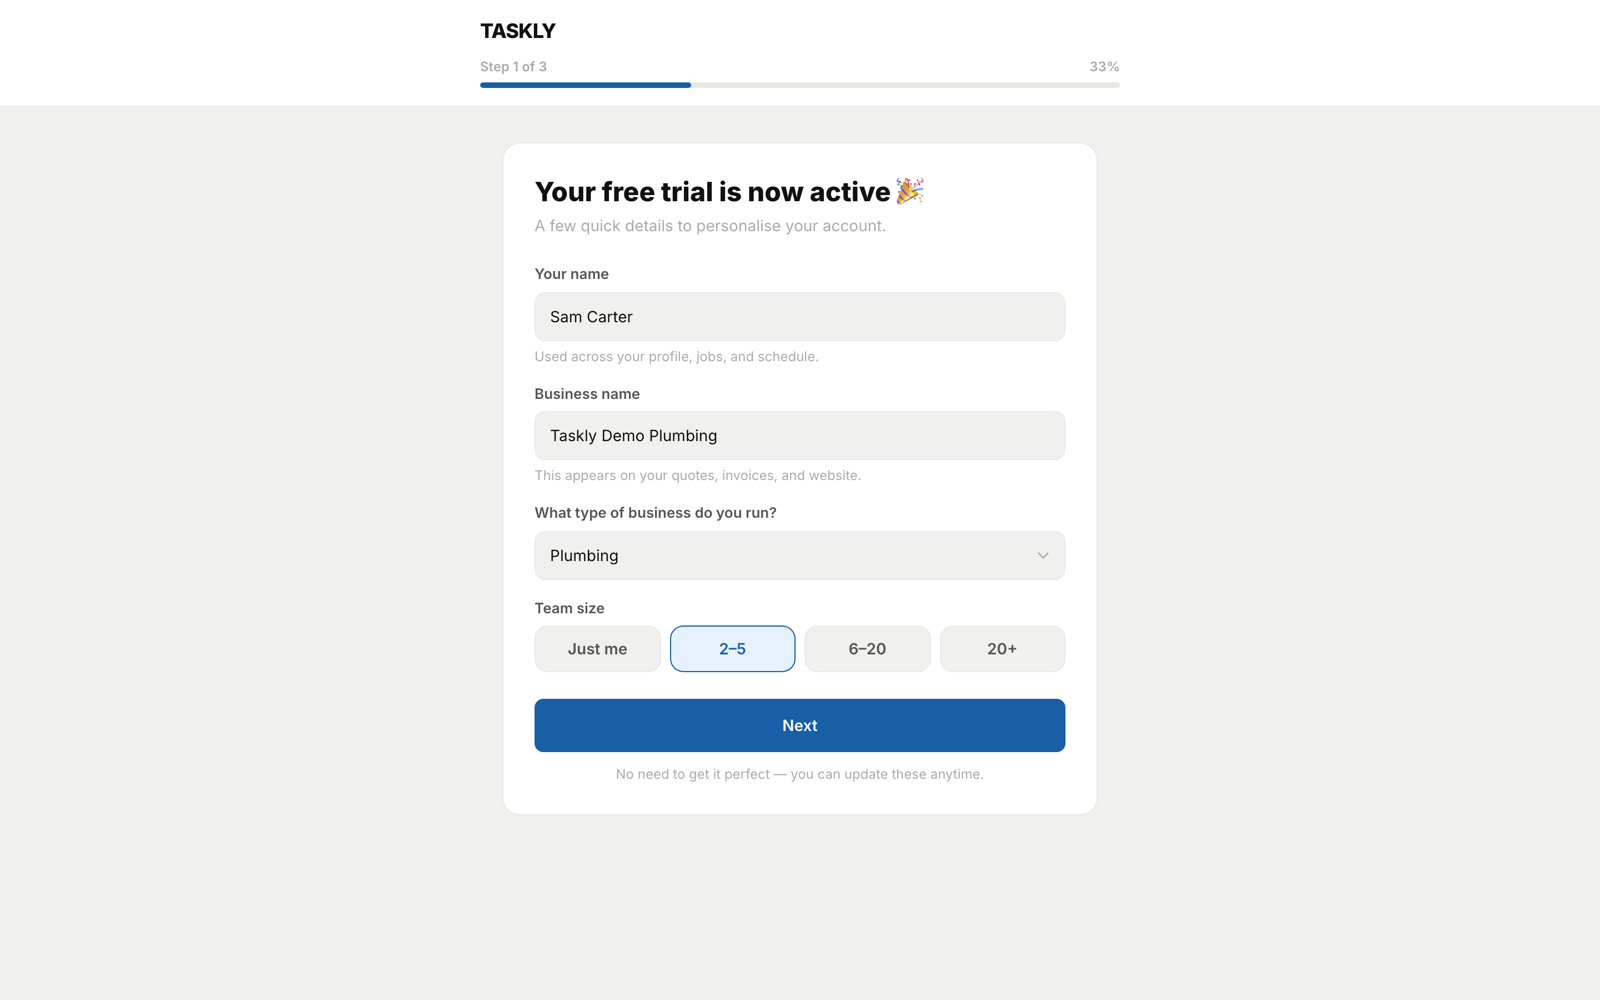
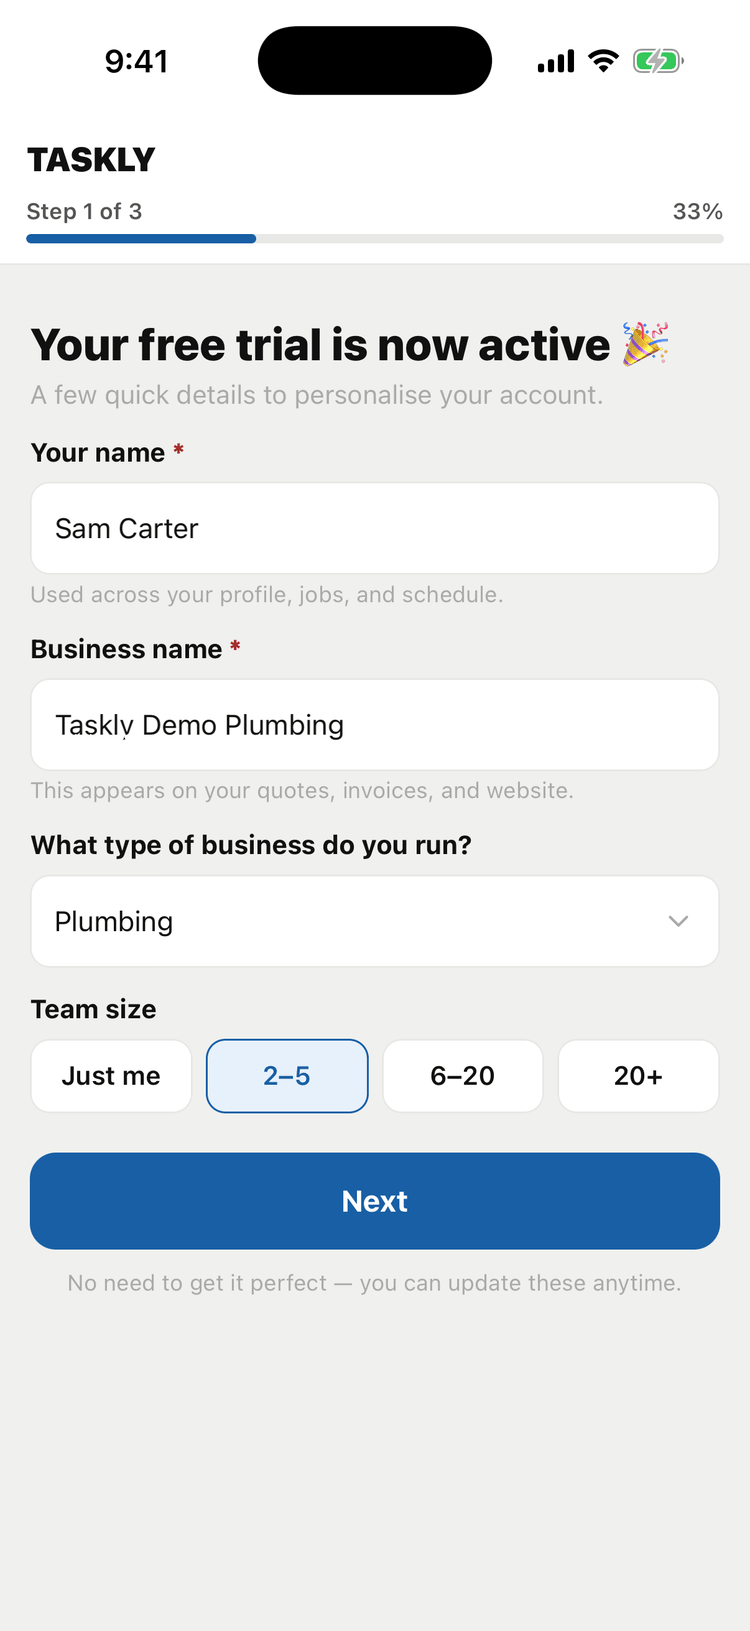
Three short questions follow, the same on both apps. The first is about your business:
- Enter Your name.
- Enter your Business name. It appears on your quotes, invoices and website.
- Choose your trade under What type of business do you run?
- Pick your Team size.
- Choose Next.
 (opens full size)
 (opens full size)
Then you’re asked for your main goal, so Taskly can show you the right features first, and how you heard about Taskly.
The last screen asks for the details printed on every quote and invoice: phone, email and address. It also asks Do you charge tax? and, if you do, shows a tax rate for your country to confirm or change. Choose Add these now, or I’ll do this later and add them from Settings whenever you like.
Tip: Your account comes with a demo customer, John Doe, and a demo job, quote and invoice so the app isn’t empty. Delete them whenever you like.
Your free trial
Every new account starts on a 14-day trial of the Basic plan, or 30 days if you signed up through someone’s referral link. Nothing is limited while it runs.
Related articles
- Add your business details
Set the name, contact details, address and tax numbers that print on your quotes and invoices.
- Add your logo and brand colour
Put your logo on your quotes and invoices, pick a colour and choose a template.